Is your once sleek gaming chair now showing its age with unsightly peeling, cracks, and worn-out patches? You’re not alone. Many gamers face the frustrating reality of deteriorating upholstery, particularly with chairs made from synthetic leathers. While tempting to simply discard it and buy new, bringing your beloved gaming throne back to life through reupholstery is a rewarding, cost-effective, and highly customizable solution. This comprehensive guide will walk you through every step, transforming your old, peeling gaming chair into a refreshed, comfortable, and stylish centerpiece of your setup.
Understanding Your Peeling Gaming Chair
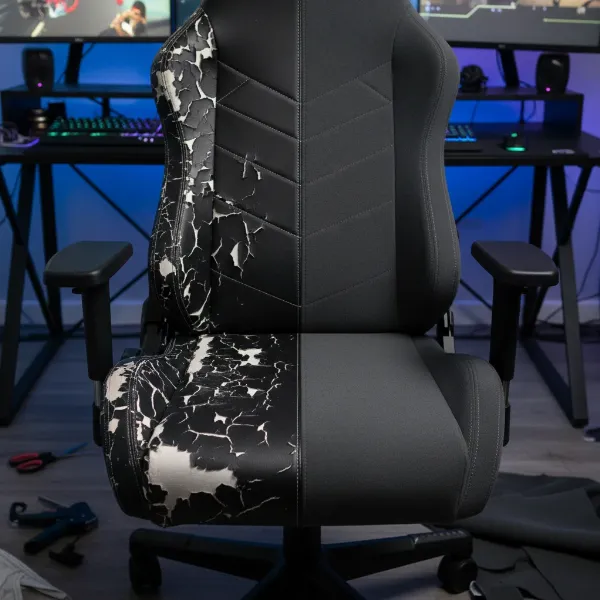
The primary culprit behind a peeling gaming chair is almost always the material itself: polyurethane leather, often referred to as PU leather, pleather, or artificial leather. While initially mimicking the look and feel of real leather at a fraction of the cost, PU leather has a finite lifespan. Over time, friction, body oils, heat, and general wear and tear cause the thin plastic coating to break down, resulting in the characteristic flaking and peeling.
Rather than succumbing to the cycle of buying new chairs every few years, reupholstering offers a sustainable and personalized alternative. It allows you to upgrade to a more durable and comfortable fabric, express your unique style, and save a significant amount compared to purchasing a high-end replacement. A DIY reupholstery project breathes new life into a mechanically sound chair, making it a truly worthwhile endeavor.
Gathering Your Arsenal: Tools and Materials
Before you begin the transformation, assembling the right tools and selecting the perfect new upholstery material are crucial steps. A well-prepared workspace and the correct supplies will make the process smoother and more enjoyable.
Essential Tools
You don’t need a professional workshop to reupholster a gaming chair, but a few key tools will be indispensable:
- Screwdriver Set: Both Phillips and flathead screwdrivers will be needed to disassemble the chair. A power drill with appropriate bits can speed up this process.
- Pliers: Needle-nose pliers or a staple remover are essential for pulling out the countless staples that secure the old upholstery.
- Staple Gun: An electric staple gun is highly recommended for ease and efficiency, though a heavy-duty manual staple gun can also work. Ensure you have plenty of upholstery staples (e.g., 3/8-inch or 5/16-inch).
- Scissors or Utility Knife: For cutting your new fabric precisely.
- Measuring Tape: To accurately measure fabric dimensions.
- Marking Pen or Chalk: For tracing patterns onto your new fabric.
- Camera or Notepaper: To document the disassembly process, which will be invaluable during reassembly.
- Work Gloves: To protect your hands from staples and sharp edges.
|
Our Picks for the Best Gaming Chair in 2026
As an Amazon Associate I earn from qualifying purchases.
|
||
| Num | Product | Action |
|---|---|---|
| 1 | TRALT Office Chair Ergonomic Desk Chair, 330 LBS Home Mesh Office Desk Chairs with Wheels, Comfortable Gaming Chair, High Back Office Chair for Long Hours (White) |

|
| 2 | Sweetcrispy Computer Gaming Desk Chair - Ergonomic PU Leather with Comfy Lumbar Support, Height Adjustable Rolling Desk with Flip-up Armrests, for Home and Office |
|
| 3 | Breathable Fabric Gaming Chair with Footrest, Height Adjustable Game Chair, Video Gaming Chair for Gaming Room, Living Room and Office - Blue/Light Grey |
|
| 4 | Razer Iskur V2 X Ergonomic Gaming Chair: Built-in Lumbar Support - Widened Seat Base - High Density Foam Cushions - Adjustable 152 Degree Recline - 2D Armrests - Plush Fabric Finish - Black |
|
| 5 | Ergonomic Office Chair with Footrest - Adjustable Lumbar Support & Headrest, 90-160° Reclining Mesh Back Computer Chair - Home Office/Gaming, 350lbs Capacity (SGS Certified) |
|
| 6 | BestOffice Gaming Chair Office Chair Ergonomic Desk Chair Racing Style Gaming Chair with Lumbar Support, Swivel Rolling Base, and Comfortable Padded Seat for Women and Men |
|
| 7 | BestOffice High-Back Gaming Chair PC Office Chair Computer Racing Chair PU Desk Task Chair Ergonomic Executive Swivel Rolling Chair with Lumbar Support for Back Pain Women, Men,White |
|
| 8 | GTPLAYER Gaming Chair,Office Chair with Pocket Spring Lumbar Support, Ergonomic Comfortable Wide Office Desk Computer Chair with Outward Fixed Soft Armrests and Footrest (PU Leather, Black) |
|
| 9 | Gaming Chair, 400 lbs Adult Chair, High Back Computer Chair with Footrest and Linked Armrests, Office Video Game Chair with Lumbar Support (Grey) |
|
| 10 | Gaming Chair with Linkage Armrest & Footrest, High Back Video Gaming Chair, Black/White |
|
Choosing Your New Upholstery Fabric
The choice of fabric is perhaps the most exciting part, offering both aesthetic and functional upgrades. Consider durability, comfort, breathability, and ease of cleaning.
- Polyester Fabric: A highly recommended choice for gaming chairs due to its exceptional durability, resistance to abrasion, and stain-resistant properties. Polyester is also easy to clean, quick-drying, hypoallergenic, and provides good air circulation, making it comfortable for long gaming sessions. Its elasticity helps prevent sagging and wrinkling.
- High-Quality Faux Leather (PU Leather/Leatherette): If you prefer the look of leather, invest in a premium-grade faux leather. Some modern formulations, like Secretlab’s NEO™ Hybrid Leatherette, are engineered for significantly greater durability than standard PU leather, offering better resistance to peeling.
- Natural Leather: The most luxurious and durable option, real leather offers unmatched breathability, longevity, and a classic aesthetic. It’s an investment, but with proper care, it can last for decades. Keep in mind that natural leather typically offers fewer color variations compared to synthetic options.
- Other Fabric Options:
- Velvet: Offers a soft, plush feel and a rich aesthetic, suitable for formal or casual setups.
- Microsuede: A soft, synthetic fabric known for its smooth texture and resistance to stains.
- Mesh: Often used in office chairs for its excellent breathability, though it might be more challenging to integrate into a traditional gaming chair design for full reupholstery.
Additional Materials
- Upholstery Staples: Match these to your staple gun and fabric thickness.
- Foam Padding or Batting (Optional): If your chair’s existing foam is compressed or damaged, new foam or a layer of batting can greatly enhance comfort.
- Upholstery-Weight Thread (Optional): If your chair has intricate sewn details or you wish to recreate specific contours, a sewing machine and strong thread will be needed.
- Fabric Glue (Optional): Useful for securing tricky edges or applying batting.
The Step-by-Step Reupholstery Process
Transforming your gaming chair is a methodical process. Take your time with each step to ensure a professional and lasting result.
Disassembly – The Art of Deconstruction
The first critical step is to carefully dismantle your gaming chair. Gaming chairs are typically assembled with several removable components.
- Document Everything: Before you touch a single screw, take numerous photos or sketch diagrams of how each part is connected. Pay close attention to the order of screws, washers, and any unique clips or mechanisms. This documentation will be your blueprint for reassembly.
- Separate Components: Begin by removing the chair’s backrest from the seat base. Then, detach the armrests and any lumbar or headrest pillows. Finally, separate the seat cushion from the chair’s mechanism and gas lift. You should be left with the individual upholstered sections (backrest, seat, armrests) and the chair’s frame.
- Organize Hardware: Keep all screws, bolts, and small parts organized in labeled containers or bags to avoid losing them.
Removing the Old Upholstery
This is where the peeling material truly comes off. Your goal is to remove the old fabric while keeping it as intact as possible to serve as a pattern.
- Locate Staples: Most gaming chair upholstery is secured with staples along the underside or edges of the plastic or wooden chair shells.
- Careful Removal: Using your flathead screwdriver and needle-nose pliers, gently pry out each staple. Work slowly to avoid tearing the underlying foam or the old fabric excessively.
- Preserve as Pattern: Once all staples are removed, carefully peel off the old faux leather. Lay each piece flat. These pieces are your patterns for cutting the new fabric.
Inspecting and Upgrading Padding
With the old fabric removed, now is the perfect time to assess the condition of the internal foam padding.
- Evaluate Foam: Check the seat and backrest foam for compression, tears, or significant wear. If the foam is still firm and resilient, you can reuse it.
- Replace or Add: If the foam is saggy or damaged, consider replacing it entirely with new high-density foam. For added comfort, you can also wrap the existing foam with a layer of upholstery batting to provide extra cushioning and a smoother profile. Secure any new foam or batting with a light spray adhesive or by carefully tucking it around the edges.
Cutting and Preparing Your New Fabric
Precision in this stage will ensure a neat finish for your reupholstered chair.
- Lay Out Fabric: Spread your new upholstery fabric right-side down on a large, clean surface.
- Trace Patterns: Place the old upholstery pieces on top of the new fabric. Use your marking pen or chalk to trace around them. Crucially, add a seam allowance of at least 2-3 inches around all edges to provide ample material for stretching and stapling.
- Cut Pieces: Carefully cut out your new fabric pieces using sharp scissors or a utility knife.
- Consider Sewing (Optional): If your original upholstery had sewn seams (e.g., contoured panels), you might need to sew your new fabric pieces together to replicate these shapes before attaching them to the chair. This is where using the old fabric as a guide for stitching lines becomes invaluable.
The Upholstery Technique: Stapling and Smoothing
This is where your chair starts to take on its new identity. Patience and an eye for detail are key here.
- Start with the Seat: Begin with the seat cushion. Center the new fabric over the foam, ensuring an even overhang on all sides.
- Initial Staples (Center): Place a single staple in the center of one side, pulling the fabric taut. Then, move to the opposite side, pull the fabric taut again, and place another staple in its center. Repeat for the remaining two sides. This anchors the fabric evenly.
- Work Outward: From these center staples, work your way outward, placing staples every 1-2 inches. As you staple, continuously pull the fabric taut to eliminate wrinkles and ensure a smooth, firm finish.
- Navigate Curves: For curved sections, make small relief cuts into the excess fabric (being careful not to cut too close to the edge) to allow it to fan out and lie flat when stapled. Gently pleat or fold the fabric as needed to maintain a smooth curve, stapling these folds securely.
- Repeat for Backrest and Armrests: Apply the same stapling technique to the backrest and any armrest pads. Remember to keep the fabric consistently taut across all surfaces.
- Trim Excess: Once all fabric is securely stapled, use scissors or a utility knife to carefully trim away any excess fabric close to the staple line for a clean finish.
Reassembly – Bringing Your Chair Back to Life
Now, it’s time to put your beautifully reupholstered components back together.
- Follow Your Documentation: Refer to the photos or diagrams you took during disassembly.
- Attach Upholstered Sections: Reattach the seat and backrest to the chair’s frame, securing them with the original screws and bolts.
- Reinstall Armrests and Accessories: Reattach the armrests, headrest, and lumbar pillows.
- Final Checks: Give all bolts and screws a final tightening. Test the chair’s adjustments (height, recline, armrests) to ensure everything functions smoothly.
Tips for a Professional Finish
Achieving a high-quality finish requires attention to detail.
- Even Tension: Maintain consistent tension when pulling the fabric. Uneven tension leads to wrinkles and a lopsided appearance.
- Crisp Edges: When stapling around edges, fold the fabric neatly and pull tightly to create sharp, defined lines.
- Consider Welt Cording: For a truly professional touch, you can add welt cording (piping) along the seams of your chair. This involves sewing cord into a strip of fabric before attaching it, providing a finished edge.
- Cleanliness: Work in a clean area to prevent dust and debris from getting embedded in your new fabric.
Expected Costs and Time Commitment
The cost and time for reupholstering vary depending on several factors:
- Fabric Cost: Upholstery fabric can range from $15 to $100+ per yard. A gaming chair typically requires 3-5 yards, depending on its size and complexity. Expect to spend $50 – $300+ on fabric.
- Tool Cost: If you need to buy all the tools, anticipate spending $50 – $150. However, many items like screwdrivers and scissors might already be in your toolbox.
- Time Commitment: For a beginner, reupholstering a gaming chair can take anywhere from 8 to 20 hours, spread over a few days. Experienced DIYers might complete it in 4-8 hours. The complexity of the chair’s design and whether sewing is required will impact the timeline.
Top Picks – Fabric Types for Enhanced Durability
When selecting your new fabric, focusing on materials known for their resilience against the rigors of gaming will pay dividends.
- Heavy-Duty Polyester: Brands like Cordura or Ballistic Nylon (while very tough, might be less comfortable) offer extreme abrasion resistance. For comfort, look for durable upholstery-grade polyester blends.
- Vinyl (Automotive Grade): If you desire a leather-like look that genuinely lasts, automotive-grade vinyl is far superior to standard PU leather. It’s designed for harsh conditions and heavy use.
- Microfiber: A dense, soft, and easy-to-clean synthetic that resists stains and holds up well to wear.
- Canvas/Duck Cloth: Extremely durable and available in many colors, canvas is a practical, no-frills option that can withstand significant abuse.
 A beautifully reupholstered gaming chair with new, durable fabric and enhanced comfort.
Conclusion
Reupholstering your old, peeling gaming chair is more than just a repair; it’s an opportunity to create a personalized, comfortable, and durable seating experience that truly reflects your style. While it requires patience and attention to detail, the satisfaction of transforming a worn-out piece into a like-new, customized throne is immense. By following these steps, choosing high-quality materials, and embracing the DIY spirit, you can significantly extend the life of your gaming chair and elevate your entire setup.
Are you ready to give your Gaming Chair the ultimate upgrade it deserves?